PHP Laravel CRUD application | Simple and easy with bootstrap and Laravel 8
Build a CRUD application with this PHP Laravel CRUD application. Here I am using Laravel 8 and Bootstrap 5 to build a full-featured todo list with in-depth info

Laravel is the most popular PHP framework out there. It’s inspired by Ruby on Rails and has tons of features to help you with rapid development. In this article, we will create a PHP Laravel CRUD application from scratch.
PHP Laravel CRUD application
First of all, in order to use Laravel, we need to install composer first. A composer is a dependency management tool for PHP projects. You can think of it like NPM for NodeJS.
PHP Laravel CRUD – Install Composer
Composer is available for Windows, Ubuntu, and Mac as well. If you are on windows then just visit the official website and download the exe file from the download link.
It's as easy as that for Windows. However, if you want to install in on Ubuntu then follow this tutorial.
Once composer is installed and set to your path you can just run a quick check to ensure everything is fine.
Open the command prompt and run the following command.
composer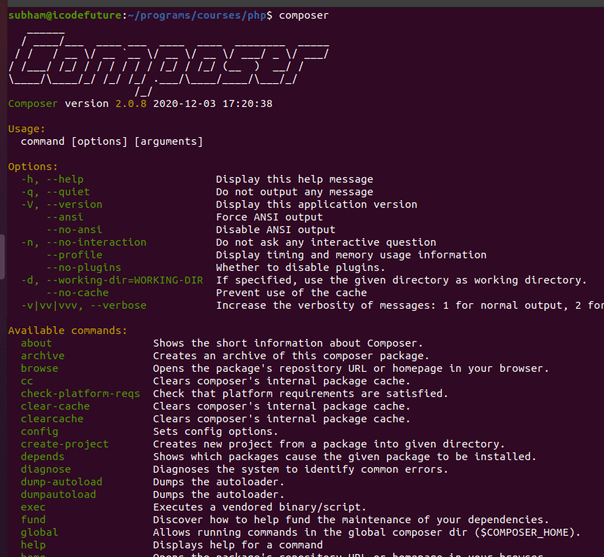
PHP Laravel CRUD – Install Laravel 8
Laravel can be installed in many different ways – using Composer, using Docker, etc. However, installation with Composer as a global package is the ideal way to start your Laravel journey.
Open the command prompt or terminal and install Laravel as follows.
composer global require laravel/installerIt will install Laravel installer as a global package.
Now we are all set to create our very first Laravel project.
laravel new todoThe above command will create a Laravel project called todo inside the current directory. Each project in Laravel comes with the default project structure.
The Laravel project structure is quite good and scalable up to a certain limit. You can learn more about the project structure in depth here.
PHP Laravel CRUD – MySQL setup
Our project is a CRUD application and we will be making a Todo list. So the database setup is our first priority as our application is based on data.
Every Laravel application has a .env file that contains the environmental configuration values for that project. This is where we need to set up our database credentials to let the application access and use our database.
Inside the .env file, you can find the default database values as below.
DB_CONNECTION=mysql
DB_HOST=127.0.0.1
DB_PORT=3306
DB_DATABASE=todo
DB_USERNAME=root
DB_PASSWORD=
So by default, the DB_CONNECTION is set to mysql and all we need to do is to update the DB_USERNAME, DB_PASSWORD, and DB_DATABASE(database name).
Once you update the values save them and let's move forward to the next step – migrations.
PHP Laravel CRUD – migrations
Migrations are PHP classes that convert into database tables. These classes are the blueprints of the database tables and columns.
It's very easy to work with databases by using such a high-level framework. Where you don't have to master SQL queries or need an in-depth knowledge of advanced database concepts.
All you need to know is how Laravel migration, query builder and ORM works.
Let's create our first migration. I will name it todos as it will hold all the todo items.
php artisan make:migration create_todos_tableThis command with creating a new migration file inside the database/migrations folder. The newly created file will look like below.
<?php

use Illuminate\Database\Migrations\Migration;
use Illuminate\Database\Schema\Blueprint;
use Illuminate\Support\Facades\Schema;

class CreateTodosTable extends Migration
{
    /**
     * Run the migrations.
     *
     * @return void
     */
    public function up()
    {
        Schema::create('todos', function (Blueprint $table) {
            $table->id();
            $table->timestamps();
        });
    }

    /**
     * Reverse the migrations.
     *
     * @return void
     */
    public function down()
    {
        Schema::dropIfExists('todos');
    }
}
Now, all we need to do is to place the fields or columns we need inside the up method. If you are not familiar with the default migration file contents yet, please consider learning laravel migrations before.
Our todos table needs two more fields task and status. So let's quickly add that too as well.
$table->id();
$table->string('task');
$table->boolean('status')->default(false);
$table->timestamps();
Our final contents inside Schema::create will look like this. Here the task is of type string and the status is boolean and set to false by default.
#Note: by default, the table fields are not nullable. To support null values for a field make sure to add nullable at the end.
An example is given below.
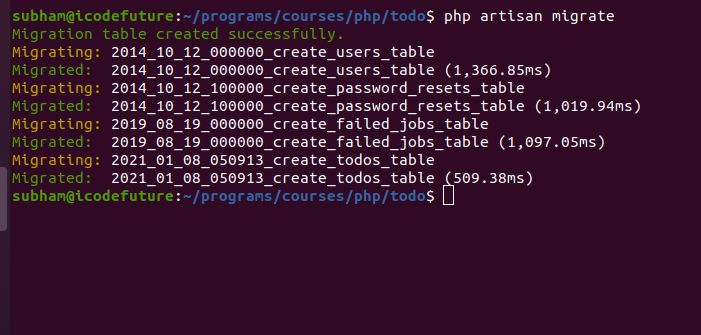
$table->string('priority')->nullable()Now as the migration is ready let's run it.
PHP Laravel CRUD – blade templating engine
So far our database is ready now we need to work on templates. As I have told you at the beginning that I will use bootstrap for styling, so start by adding that.
Create a new file called app.blade.php inside resources/views. Put the following code inside of it.
<!doctype html>
<html lang="en">
    <head>
        <!-- Required meta tags -->
        <meta charset="utf-8">
        <meta name="viewport" content="width=device-width, initial-scale=1">

        <!-- Bootstrap CSS -->
        <link href="https://cdn.jsdelivr.net/npm/bootstrap@5.0.0-beta1/dist/css/bootstrap.min.css" rel="stylesheet" integrity="sha384-giJF6kkoqNQ00vy+HMDP7azOuL0xtbfIcaT9wjKHr8RbDVddVHyTfAAsrekwKmP1" crossorigin="anonymous">

        <title>Laravel CRUD</title>
    </head>
    <body>
        <h1>Todos</h1>
        <hr>

        <h2>Add new task</h2>
        <hr>

        <h2>Pending tasks</h2>
        <hr>

        <h2>Completed Tasks</h2>

        <script src="https://cdn.jsdelivr.net/npm/bootstrap@5.0.0-beta1/dist/js/bootstrap.bundle.min.js" integrity="sha384-ygbV9kiqUc6oa4msXn9868pTtWMgiQaeYH7/t7LECLbyPA2x65Kgf80OJFdroafW" crossorigin="anonymous"></script>
    </body>
</html>
Here we have the CDN links to the latest Bootstrap v5.
Inside the body, we have 3 sections. Add new tasks, pending tasks, and completed tasks.
Add new tasks will have a form to add a new todo. Pending tasks will list all the todos where the status is false.
Finally completed tasks will display all the todos with status true.
PHP Laravel CRUD – Controllers
Our view is ready so let's create a controller and start with our PHP Laravel CRUD operation.
php artisan make:controller Todo -rThis command will create a Controller called Todo inside app/Http/Controllers. The argument -r at the end will create a resource controller class.
The bare class will contain some methods by default. That's a glimpse of how Laravel can help with rapid development.
Now, let's focus on our PHP Laravel CRUD.
<?php

namespace App\Http\Controllers;

use Illuminate\Http\Request;

class Todo extends Controller
{
    /**
     * Display a listing of the resource.
     *
     * @return \Illuminate\Http\Response
     */
    public function index()
    {
        //
    }

    /**
     * Show the form for creating a new resource.
     *
     * @return \Illuminate\Http\Response
     */
    public function create()
    {
        //
    }

    /**
     * Store a newly created resource in storage.
     *
     * @param  \Illuminate\Http\Request  $request
     * @return \Illuminate\Http\Response
     */
    public function store(Request $request)
    {
        //
    }

    /**
     * Display the specified resource.
     *
     * @param  int  $id
     * @return \Illuminate\Http\Response
     */
    public function show($id)
    {
        //
    }

    /**
     * Show the form for editing the specified resource.
     *
     * @param  int  $id
     * @return \Illuminate\Http\Response
     */
    public function edit($id)
    {
        //
    }

    /**
     * Update the specified resource in storage.
     *
     * @param  \Illuminate\Http\Request  $request
     * @param  int  $id
     * @return \Illuminate\Http\Response
     */
    public function update(Request $request, $id)
    {
        //
    }

    /**
     * Remove the specified resource from storage.
     *
     * @param  int  $id
     * @return \Illuminate\Http\Response
     */
    public function destroy($id)
    {
        //
    }
}
Here is our Todo Controller. Let's begin with the index method.
index
The purpose of the index method is to get all the todos from the database and render them into view.
$todos = DB::table('todos')->get();
return view('app', ['todos' => $todos]);
In the above code, I am using Laravel query builder to get all the todos from the database and in the next line passing the data to the view file app.blade.php
In order to make it work please make sure to import DB at the top.
use Illuminate\Support\Facades\DB;This DB class is the query builder of Laravel. Now we need to loop through the data in our view.
<h2>Pending tasks</h2>
<ul class="list-group">
@foreach($todos as $todo)
    <li class="list-group-item">{{ $todo->task }}</li>
@endforeach
</ul>
We can loop through the data easily with blade directives. Now, let’s move to the store method and handle data insertion.
store
The store method of our PHP Laravel CRUD application will perform data validation, data insertion, and finally redirection with a flash message.
public function store(Request $request)
{
    // validate the form
    $request->validate([
        'task' => 'required|max:200'
    ]);

    // store the data
    DB::table('todos')->insert([
        'task' => $request->task
    ]);

    // redirect
    return redirect('/')->with('status', 'Task added!');
}
The above code will do all the things we need. Now in order to make it work let's first add the form inside our view.
<h2>Add new task</h2>
@if ($errors->any())
    <div class="alert alert-danger">
        <ul>
            @foreach ($errors->all() as $error)
                <li>{{ $error }}</li>
            @endforeach
        </ul>
    </div>
@endif
<form action="{{ url('/todos') }}" method="POST">
    @csrf
    <input type="text" class="form-control" name="task" placeholder="Add new task">
    <button class="btn btn-primary" type="submit">Store</button>
</form>
Here I have added an if block to display error messages if any. Then we have a form with a csrf field, an input for the task, and a submit button.
Kindly take a look at the form action. Once someone fills the form and submits it then it will go to /todos route.
There is one more thing that we need to handle flash messages in our template.
Just add the following block after the pending tasks headline.
@if (session('status'))
    <div class="alert alert-success">
        {{ session('status') }}
    </div>
@endif
It will look for the flash message in session with key status and render the value inside Bootstrap alert. So far we are ready to give it a try after binding these Controller methods to routes.
PHP Laravel CRUD – routing
Open the web.php file routes directory. Laravel makes it easy to maintain routes by diving web, api, console, and channels routes into separate files.
First, you need to get rid of the default route so go ahead and remove it. Next, add the following routes.
use App\Http\Controllers\Todo;

Route::get('/', [Todo::class, 'index']);
Route::post('/todos', [Todo::class, 'store']);
Laravel 8 has updated the syntax of binding a route to a Controller method.
Finally, we have completed the create and retrieve functionality of our PHP Laravel CRUD application.
Now, let's give it a try before we move further.
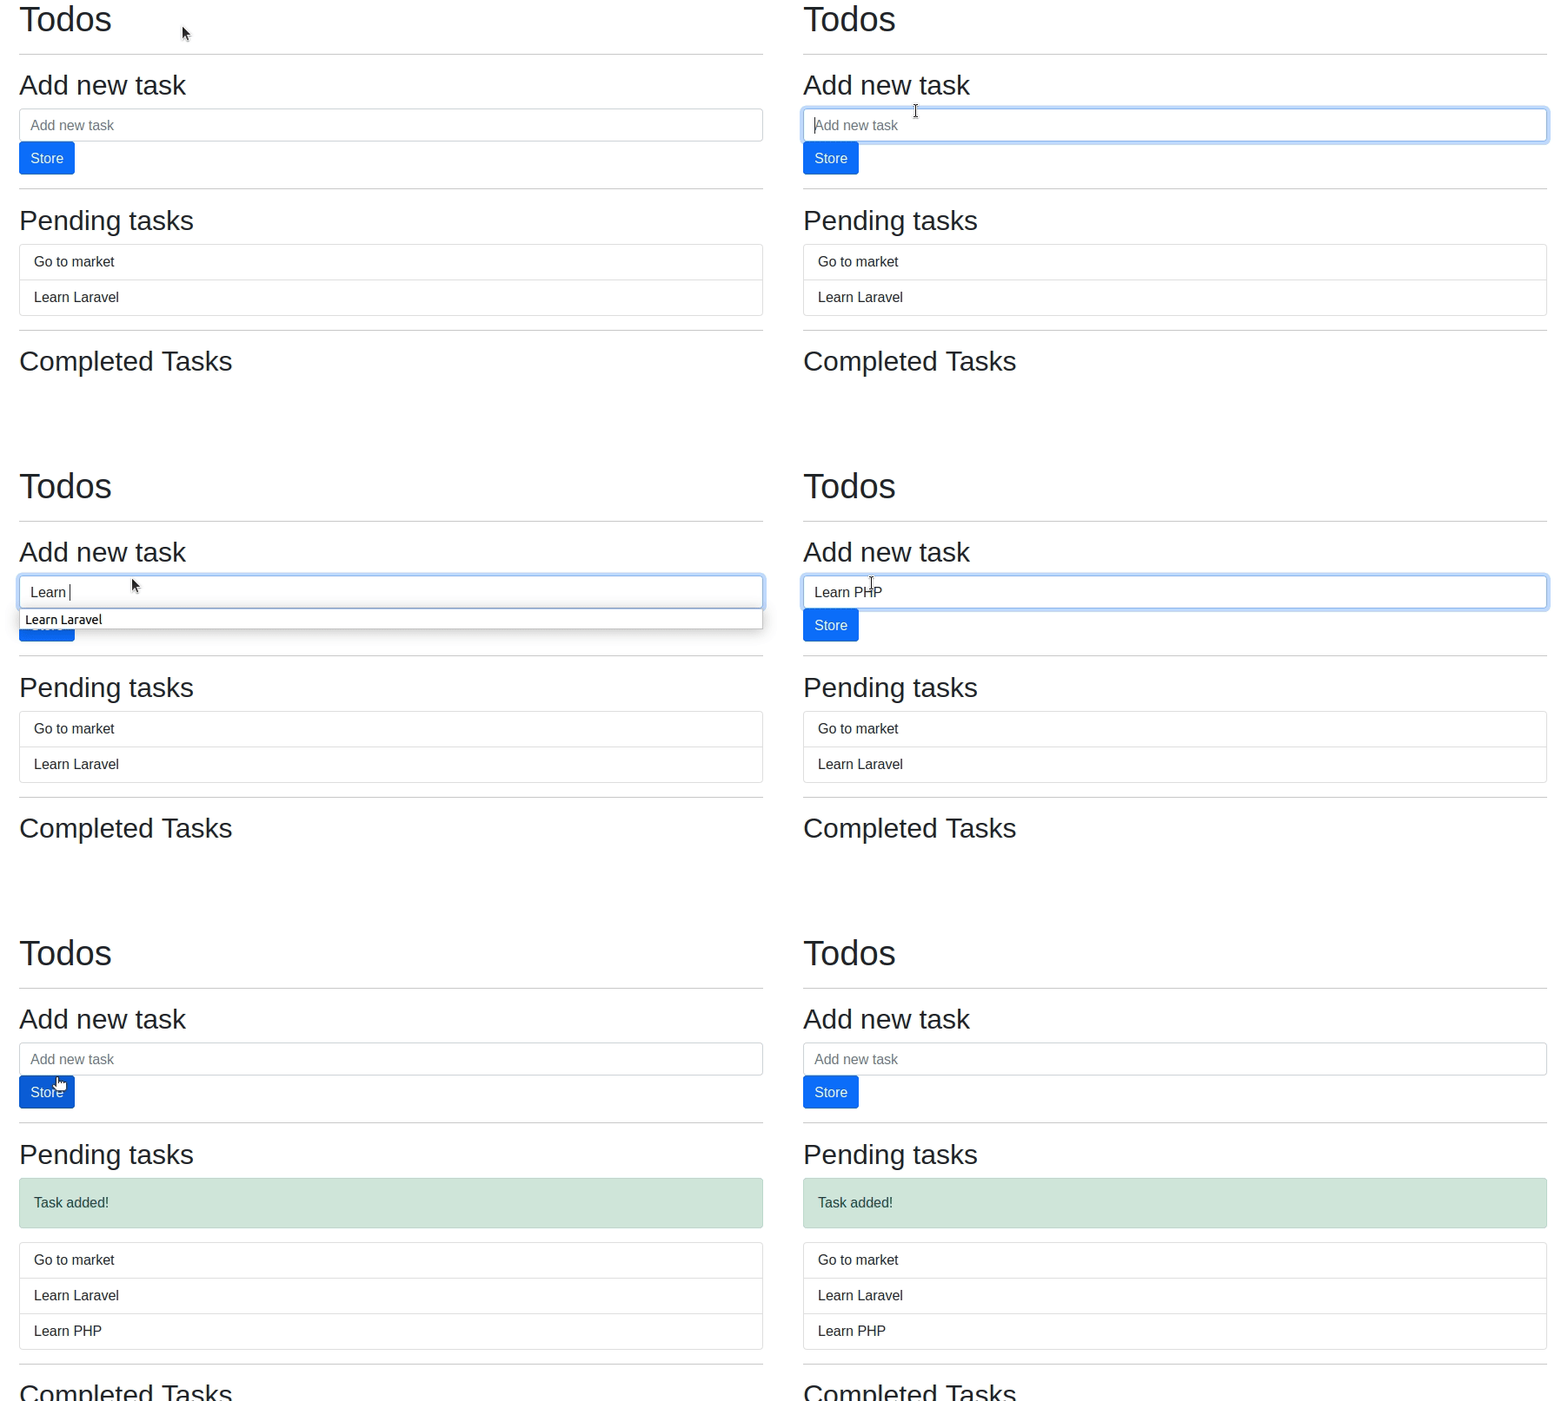
It's time to move further and handle the edit and delete process as well.
PHP Laravel CRUD – Edit tasks
In order to edit tasks, the first thing we need is to add a form to edit values and then update.
Modify your template and replace the old loop with the following.
@foreach($todos as $todo)
    <li class="list-group-item">
        {{ $todo->task }}
        <button class="btn btn-primary" type="button" data-bs-toggle="collapse" data-bs-target="#collapse-{{ $loop->index }}" aria-expanded="false">
            Edit
        </button>

        <div class="collapse mt-2" id="collapse-{{ $loop->index }}">
            <div class="card card-body">
                <form action="{{ url('todos/'.$todo->id) }}" method="POST">
                    @csrf
                    @method('PUT')
                    <input type="text" name="task" value="{{ $todo->task }}">
                    <button class="btn btn-secondary" type="submit">Update</button>
                </form>
            </div>
        </div>
    </li>
@endforeach
Here inside the list item, we have a button that will toggle the visibility of the div with class collapse. It's a Bootstrap collapse component.
Inside the div, we have a form with PUT request and it will be handled by a dynamic route. The route pattern will look like – /todos/x (where x is the todo id).
Browsers do not support PUT or DELETE requests and that’s why we need to explicitly include @method to handle it as a PUT request.
Make sure to add the @csrf as well.
Now we need to handle the update process from inside our Todo Controller.
update
public function update(Request $request, $id)
{
    // validate the form
    $request->validate([
        'task' => 'required|max:200'
    ]);

    // update the data
    DB::table('todos')->where('id', $id)->update([
        'task' => $request->task
    ]);

    // redirect
    return redirect('/')->with('status', 'Task updated!');
}
It will look very similar to the store method except for one thing, the query. Here instead of insert, we will need an update, and with where clause we can pass the condition.
$id is the parameter that directly accessible by the method from the route.
Add the new route to our web.php file.
Route::put('/todos/{id}', [Todo::class, 'update']);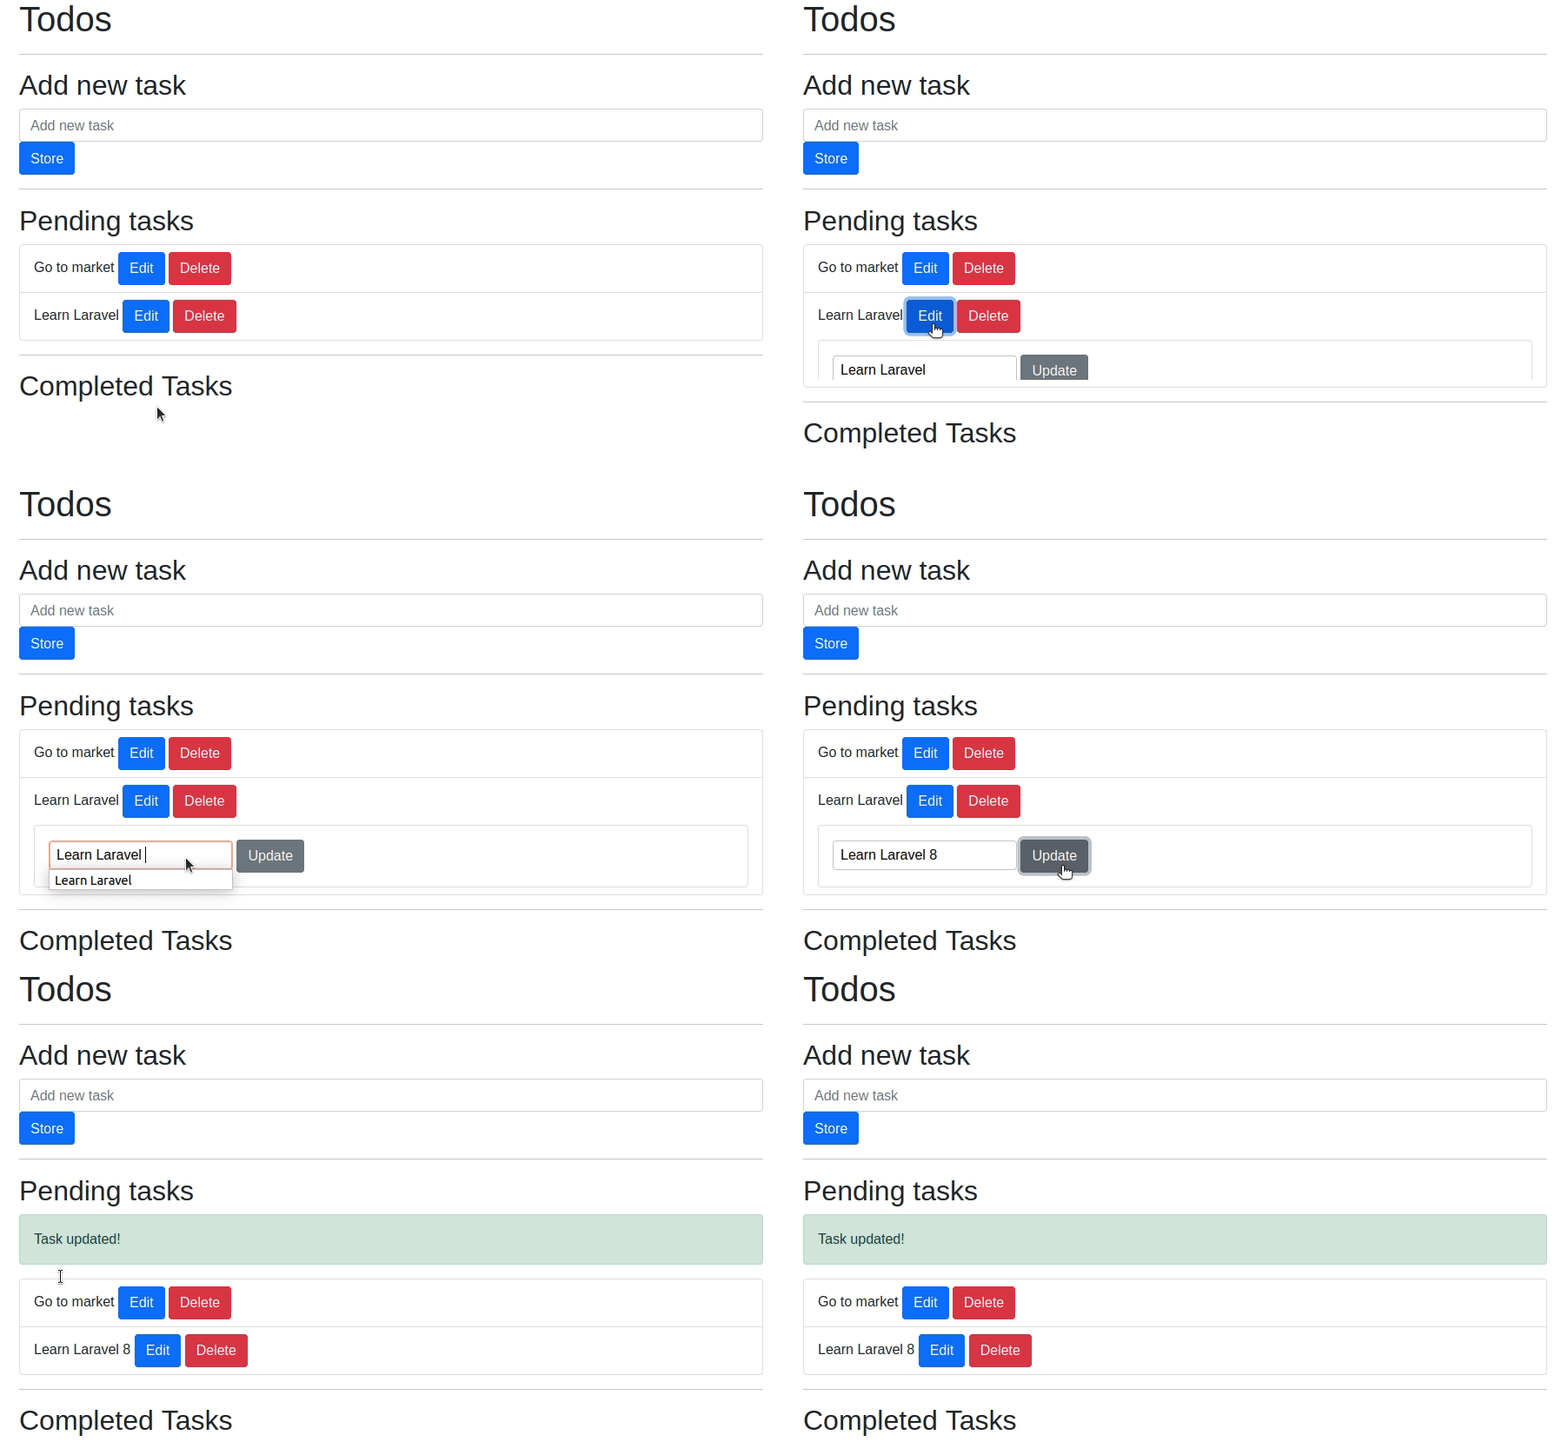
PHP Laravel CRUD – Delete tasks
This is the last section of our PHP Laravel CRUD application. We are about to implement the final functionality to delete a specific item from the to-do list.
After the edit button inside the for each loop just add a form as follows.
<form action="{{ url('todos/'.$todo->id) }}" method="POST" style="display: inline-block;">
    @csrf
    @method('DELETE')
    <button class="btn btn-danger" type="submit">Delete</button>
</form>
The form action is the same as the update and I have passed the DELETE inside the method.
Now, let's add a new route to handle the delete process.
Route::delete('/todos/{id}', [Todo::class, 'destroy']);Finally, let's move to the destroy method and add the code to delete a specific todo item with its id.
public function destroy($id)
{
    // delete the todo
    DB::table('todos')->where('id', $id)->delete();

    // redirect
    return redirect('/')->with('status', 'Task removed!');
}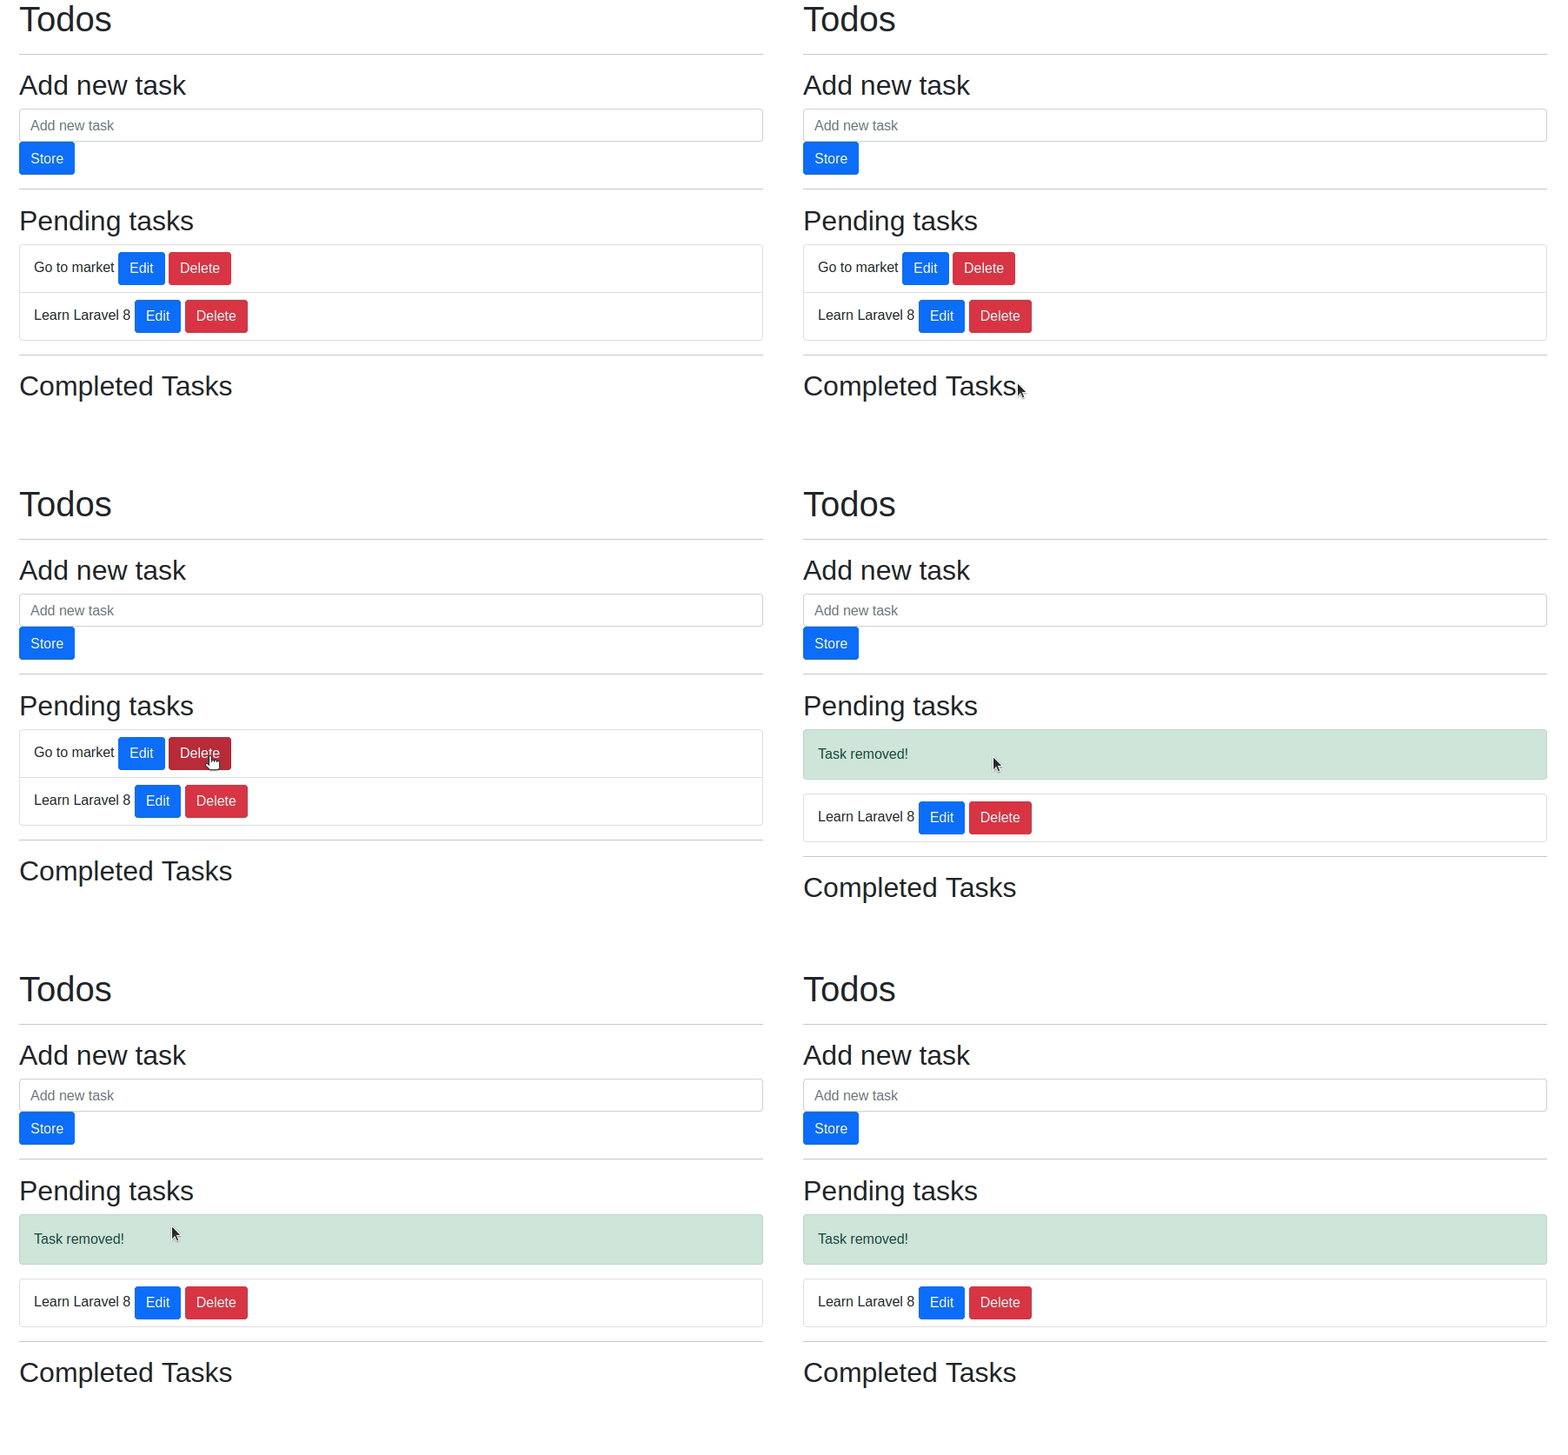
So that's it, our entire PHP Laravel CRUD application is ready. Now you can create new tasks, edit old tasks, delete any tasks and also retrieve all the tasks.
One thing that I have not shared yet is the use of todo status. We should be able to mark a task as completed when it's done.
So this way we can also filter pending and completed tasks. This article was all about the process of creating a PHP Laravel CRUD application.
I know you are curious about how to use the status to filter todos and add a toggle status functionality to create a better todo application. Hold on for a while and let me share that with you in the next article.
Comments
Godwin
Nice article...Very helpful..
Pritesh
thank for this crud applicatiion
tarane
very goooooood